- Updated on August 19, 2024
- Exchange, Hybrid, Microsoft 365, Powershell
- 29 Comments
When all the mailboxes are in Exchange Online, and all the SMTP relay goes directly from the devices and applications to Office 365, we can remove the Exchange Hybrid Configuration. After that, keep only one Exchange Server for management purposes. In this article, you will learn how to delete Exchange Hybrid Configuration step by step.
Table of contents
- Point MX records to Office 365
- Point Autodiscover record to Office 365
- Remove Service Connection Point (SCP)
- Remove Hybrid Configuration
- Keep one Exchange Server
- Disable OAuth configuration
- Remove connectors in Exchange Online
- Remove organization relationship in Exchange Online
- Remove send connector in Exchange on-premises
- Keep Exchange Hybrid deployment
- Conclusion
Point MX records to Office 365
The MX record needs to point to Office 365, which is domain-com.mail.protection.outlook.com. Go through the article: Update MX records to Office 365.
Point Autodiscover record to Office 365
The Autodiscover record needs to point to Office 365, which is autodiscover.outlook.com. Go through the article: Autodiscover URL in Exchange Hybrid.
Remove Service Connection Point (SCP)
Remove the Autodiscover Service Connection Point (SCP) on the Exchange Servers by clearing the entry. This ensures that it will not return an SCP. Go through the article: Autodiscover URL in Exchange Hybrid.
Remove Hybrid Configuration
Remove the Hybrid Configuration object from Active Directory to prevent the Hybrid Configuration from being recreated in the future.
Run Exchange Management Shell as administrator. Next, run the Remove-HybridConfiguration cmdlet.
[PS] C:\>Remove-HybridConfiguration -Confirm:$falseCopy
Verify that the Hybrid Configuration is successfully removed. Run the Get-HybridConfiguration cmdlet, and the output will be empty.
[PS] C:\>Get-HybridConfigurationCopy
Keep one Exchange Server
You should keep one Exchange Server on-premises for management purposes. Remove all other Exchange Servers to free up resources for other machines. Think about disk space, memory, and CPU. You don’t need to add a lot of disk space, memory, and CPU on the last Exchange Server. That’s because it will only be there for management purposes. There is no need to have a Database Availability Group or other High Availability options.
Note: Keep the Exchange Server with management purposes up to date with the latest Exchange Cumulative Update and Exchange Security Update.
Disable OAuth configuration
You have to disable OAuth from both on-premises and Microsoft 365.
Run Exchange Management Shell as administrator and run the command below to disable OAuth configuration from on-premises.
[PS] C:\>Get-IntraOrganizationConnector | Set-IntraOrganizationConnector -Enabled $falseCopy
Verify that OAuth is disabled from on-premises with the Get-IntraOrganizationConnector cmdlet. The Enabled column will show as False.
[PS] C:\>Get-IntraOrganizationConnector | Format-Table Name,Enabled,TargetAddressDomains

Name                                             Enabled TargetAddressDomains
----                                             ------- --------------------
HybridIOC - 5635832e-d272-46fa-8161-7bfcdfc9aaa2   False {exoip365.mail.onmicrosoft.com}
Copy
Run Windows PowerShell as administrator and connect to Exchange Online PowerShell.
PS C:\> Connect-ExchangeOnlineCopy
Run the command below to disable OAuth configuration from Microsoft 365.
PS C:\> Get-IntraOrganizationConnector | Set-IntraOrganizationConnector -Enabled $falseCopy
Verify that OAuth is disabled from Microsoft 365 with the Get-IntraOrganizationConnector cmdlet. The Enabled column will show as False.
PS C:\> Get-IntraOrganizationConnector | Format-Table Name,Enabled,TargetAddressDomains

Name                                             Enabled TargetAddressDomains
----                                             ------- --------------------
HybridIOC - 25ed1cea-670f-45c3-854e-e3a1d0a4651c   False {exoip.com}
Copy
Remove connectors in Exchange Online
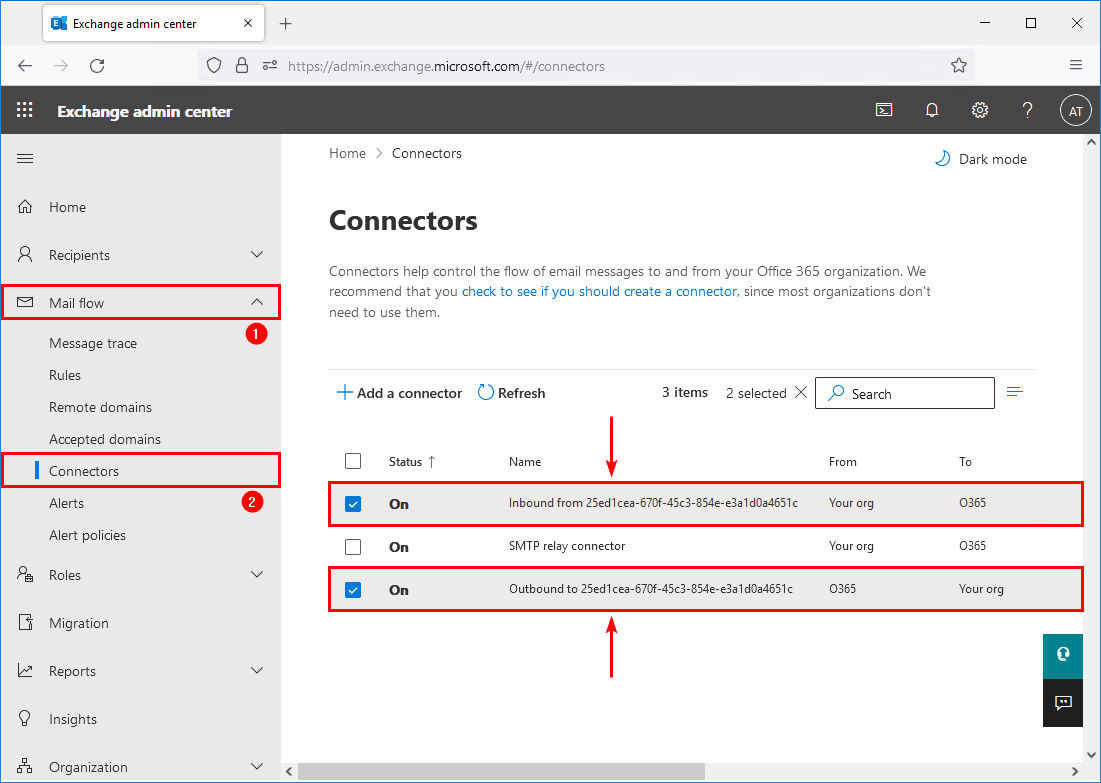
The Hybrid Configuration Wizard created inbound and outbound connectors in Exchange Online. Follow the steps below to delete the connectors in Exchange Online:
- Sign in to Microsoft 365 Exchange admin center
- Expand Mail flow and click on Connectors
- Delete the connectors named Inbound from <unique identifier> and Outbound to <unique identifier>
Remove organization relationship in Exchange Online
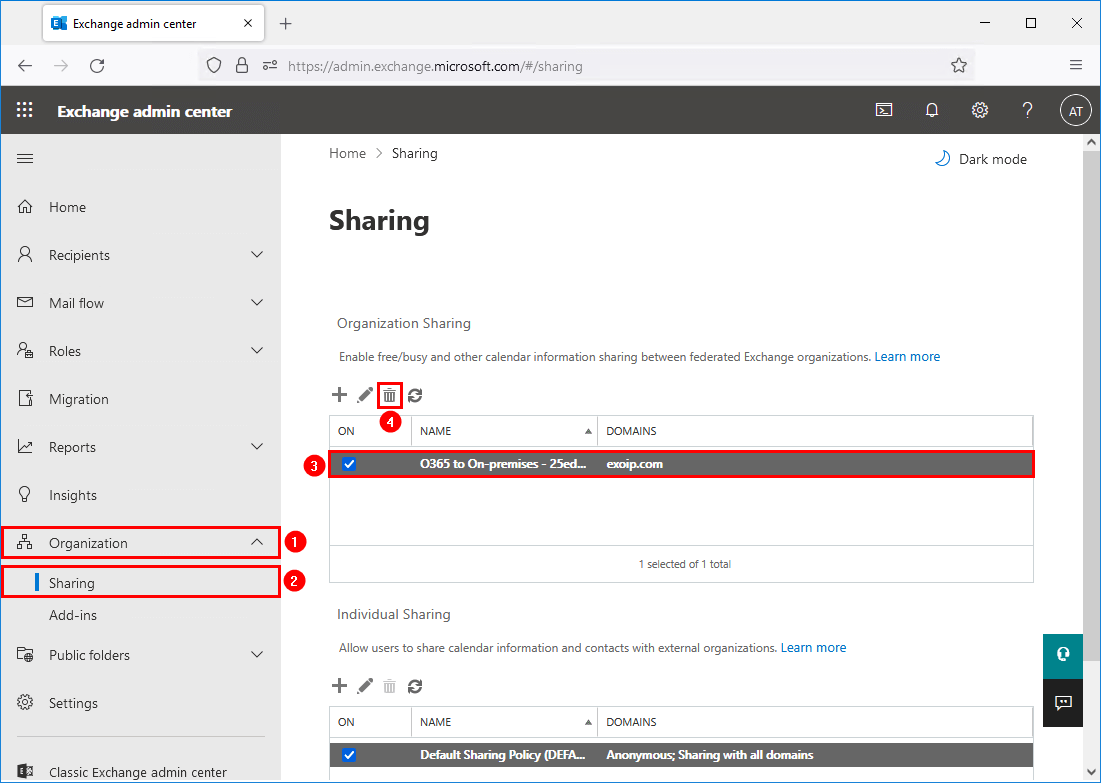
The Hybrid Configuration Wizard created an organization relationship. Follow the steps below to delete the organization relationship in Exchange Online:
- Sign in to Microsoft 365 Exchange admin center
- Expand Organization and click on Sharing
- Delete the organization named O365 to On-premises – <unique identifier>
Remove send connector in Exchange on-premises
The Hybrid Configuration Wizard created an outbound connector in Exchange on-premises. Follow the steps below to delete the send connector in Exchange on-premises:
- Sign in to Exchange admin center
- Expand mail flow and click on send connectors
- Delete the outbound connector named Outbound to Office 365 – <unique identifier>
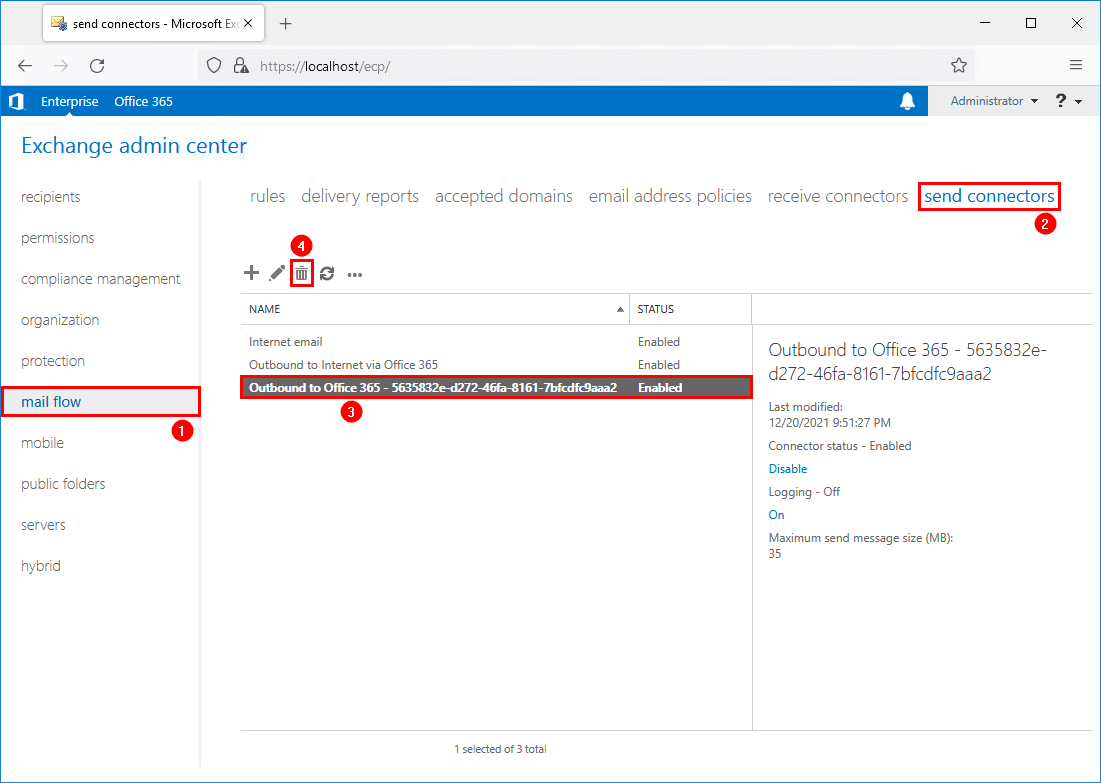
You can remove all the Exchange on-premises send connectors. That’s because the Exchange Server will not send emails anymore. Instead, the SMTP relay goes through Office 365 directly from the devices and applications.
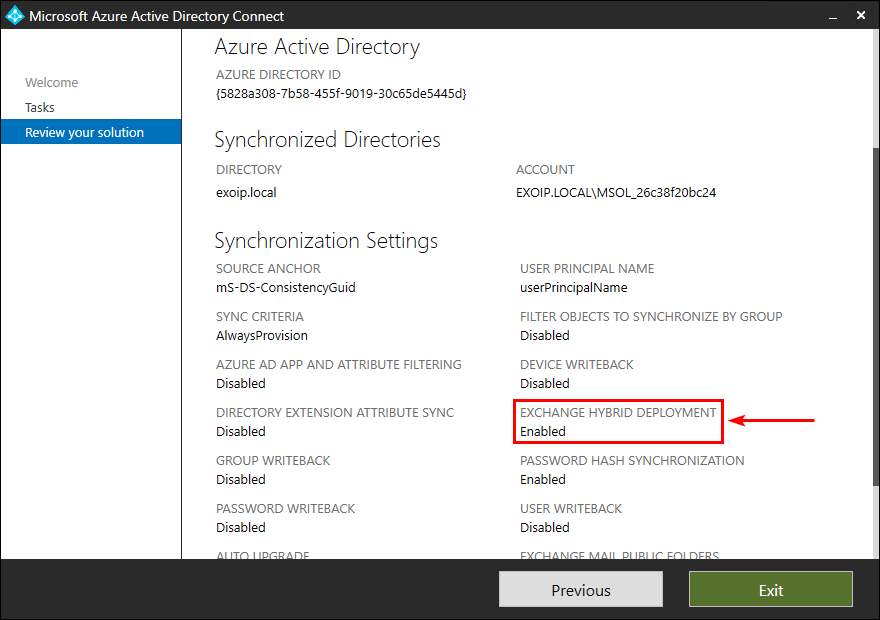
Keep Exchange Hybrid deployment
Leave the Exchange Hybrid Deployment feature enabled in Azure AD Connect.
You successfully did remove Exchange Hybrid Configuration.
Read more: Install Exchange Security Update step by step »
Conclusion
You learned how to remove Exchange Hybrid Configuration step by step. When all mailboxes are in Office 365 and the SMTP relay goes through Office 365, it’s an excellent time to delete the Hybrid Configuration. Every step is essential, and you have to go through them all and ensure that the Hybrid Configuration is successfully removed. Don’t forget to keep one last Exchange Server for management purposes.
Did you enjoy this article? You may also like the course Exchange Hybrid. Don’t forget to follow us and share this article.
Source: https://www.alitajran.com/remove-exchange-hybrid-configuration/